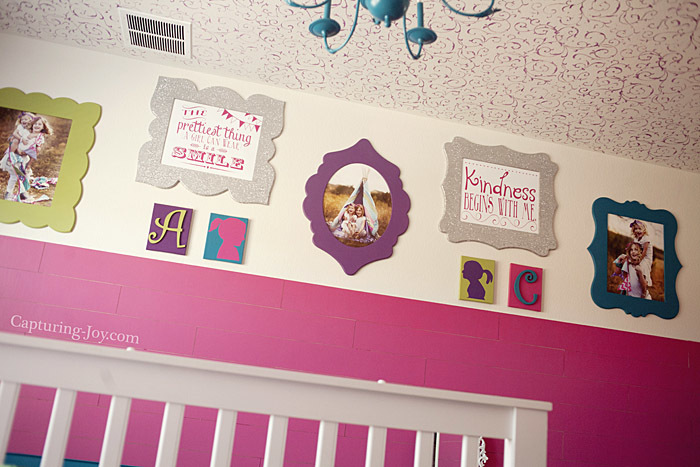
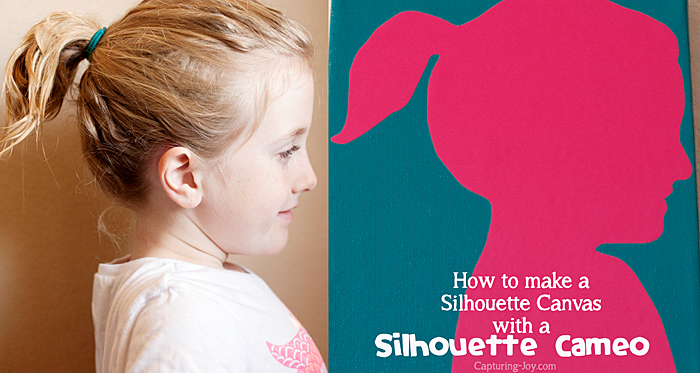
I’m so excited to show you how to make a Silhouette Canvas with a Silhouette Cameo that I shared in the girls Fancy Room Gallery Wall. This was my very first project with my new Silhouette Cameo machine, and it was so exciting how easy it was!
I have long admired the Silhouette, but the idea of actually having one in my possession left me paralyzed with fear that I’d be overwhelmed learning another gadget. But my desire to make fun projects outweighed that fear, and I hooked it up to my electronic arsenal in my office last week, with the help of my fabulous neighbor and friend, Staci. She’s a pro, she makes vinyl cuteness on a regular basis in her etsy shop.
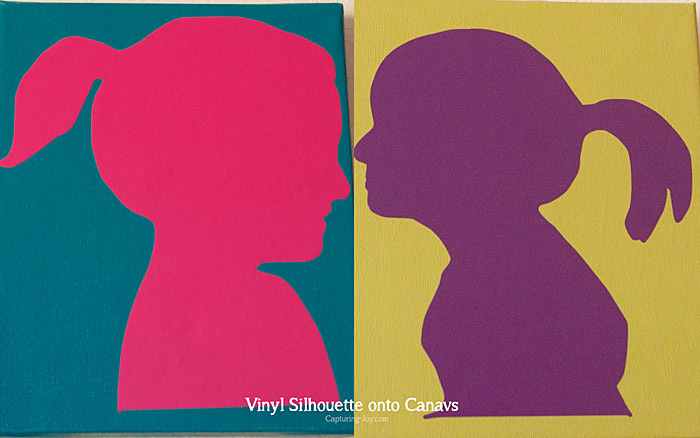
Along with the excitement of cutting fun shapes right in my office, it was SO fun to look around the Silhouette site to see all the super cute shapes they offer. At $1 per shape, it’s pretty reasonable, and I love that I pick what I want and have the shape on my computer after. I decided I wanted to add some art to My Girls Room gallery wall with fun colored silhouette shots. Here is the “picture to silhouette” before and after!
I’m going to share some tips and what I wish I would have done for these silhouette head shots.
Step 1: To make the silhouette shapes of my girls, I first took their pictures against a solid background wall. It doesn’t matter what they are wearing, nor what their hair looks like, but I like the look of a ponytail in a silhouette for girls, shows more neck and head shape. I mentioned a little about this in my photography post, how to shoot a great silhouette, that the arm, head, and neck positioning is important. What I didn’t realize until I compared the two vinyl pieces later, is that my younger daughter is slightly hunched over as opposed to her sister sitting up tall. I don’t mind it–adds some character to her silhouette, but some may not care for it. Also, the light rays coming in on her face didn’t matter.
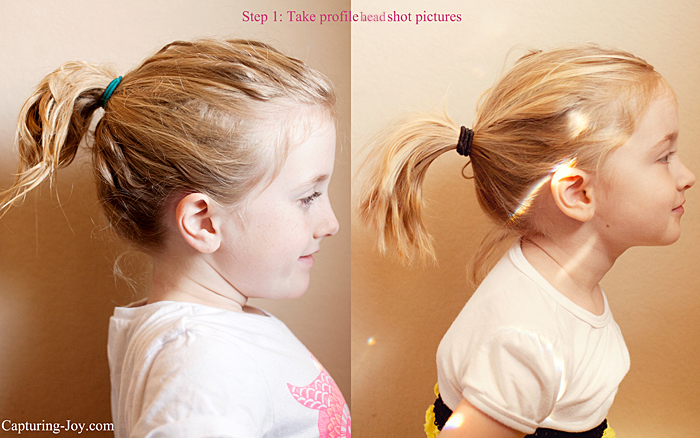
Step 2: Get the images on your computer and choose the final image to tweak. I took about 10 pictures each because my girls were squirmy and naturally kept looking AT ME for a picture! I had to remind them to look at the boring wall in front of them;) I took a few with them smiling “showing their teeth” a few with a grin, and a few with a serious face. I chose the slightly grinning shots. In the final silhouette, my older daughter’s profile shows more of the grin that my younger daughters–hard to really tell what will look best, but just go with it!
Step 3: In the Silhouette software, I uploaded my .jpg picture file, go to the “open trace window” on the top right toolbar. Then select the trace area and highlight the .jpg file/picture. This will then outline your image in YELLOW. The yellow is your cut line. Then in the right sidebar, hit “trace outer edge” and then you drag/pull the picture off to the right and your cut lines will stay on the Silhouette document in RED. Delete the original image (that you pulled off to the side) and then you’ll have the RED traced silhouette on the document.
Step 4: Place your vinyl on the mat and load it into your Silhouette machine.
Step 5: To cut your traced image, Go to FILE–send to Silhouette, and on your right side you will see a pop up, and your settings will be in BLUE. The Silhouette website gives cut guidelines depending on what you are cutting. I have a new blade, set at a depth of “1” and I used a speed of “6” and a thickness of “8” and hit CUT.
Using the Silhouette Studio® Designer Edition Software, the ruler guidelines helped me see exactly the correct layout, and it really helped me out as a beginner to have that extra guide. I love that the Silhouette recognizes to cut vinyl, paper, fabric, or whatever. This is additional software that is a companion to the Silhouette machine, and a great investment because of it’s options. {To see other ways that the Designer Edition software is used, CLICK HERE or watch this video.}
If you don’t have a Silhouette machine yet (are you scared like I was?) or have it, but want the advanced capabilities of the Designer Edition, you can buy it today from my site with a BIG FAT DISCOUNT!! Half off the software (normally $50 but with my discount, and it’s $25) and discounts for the machines, too (the Silhouette Portrait machine is smaller and cuts 8.5×11 while the Cameo is larger and cuts 12×12.)

Click HERE to take advantage of this month’s discount and don’t forget to enter KRISTENDUKE as the promo code to get your discount!
I am in LOVE with the cuteness of my girls in silhouette form, it adds such a sweet touch to their fancy gallery wall.
{Edited to add: The Girls Fancy Room Makeover Reveal is up, check it out!}