For those that know me and my blog know that I’m all about Saying NO to Auto. Goodness sake, I wrote a book about it! Today I’m sharing how to fix a picture taken in auto. Firstly, I’m a photographer with a desire to teach moms to use their fancy cameras the RIGHT way. BUT, I also think it is necessary to emphasize that it is more important to capture the moment, than to be fiddling with your camera in the moment and miss the shot. (It’s important to practice using your camera when you don’t care about the shots). I found this gem of a shot while pulling images to guest post for Lil Luna today, and sharing tips about photographing newborns.

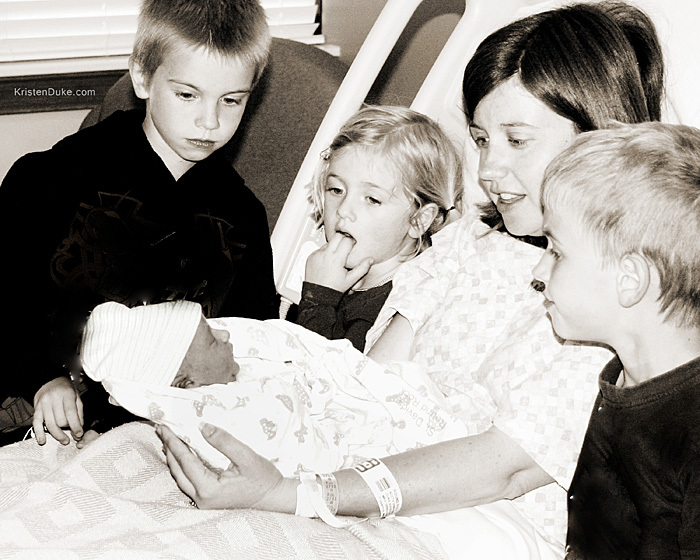
I simply LOVE this picture. I had my friend Tamiel come in and take some pictures for me when my older kids met the baby for the first time and I adore these moments captures. My friend didn’t have any camera experience, so I quickly flipped it to auto and handed off my camera. Maybe now I’d pre set the settings and hand it off, but this was easier. My photography motto is that I’d much rather have the moment captured than worry about having it captured right…the time to learn is not in the hospital. So she snapped away, and I got lots of images like the one on top. LOVE the moment, but I needed to clean it up a bit to enjoy the capture a little more. Here are some tips if you have images that you wished looked a little prettier than what you get on Auto.
Tips for cleaning up a photo taken in the Automatic Mode:
- Crop in Close–this shot was pulled back, and when I zoomed in, it made the image a much more intimate moment.
- Turn it to black and white–I’ve seen it all around the blogosphere, a picture taken on AUTO looks much better when turned to black and white. It evens out bad color temperature (too orange or too blue) and takes out a lot of distractions from the background.
- Erase out distracting t-shirt logo’s— In Photoshop, use the patch tool and clone stamp together. In Picmonkey, follow these tips for cloning and erasing. I’m basically grabbing the dark part of the shirt and “covering up” the logo’s and making it a solid shirt. After erasing the logo’s, I used the BURN tool (in photoshop) to darken the area to match the rest. I left some of the logo to see where the edges are, I just didn’t quite finish the job!
This will probably take 10-15 minutes to work little by little on erasing the distractions. It was worth it for this shot!
. 
I’ve got lots more photo tips to share, and if you want to learn to Say NO to Auto, check out my book!

If you’d to join the Capturing Joy Photo Club on Facebook, where we have photo challenges, Q&A’s, and image sharing, request to join HERE: https://www.facebook.com/groups/CapturingJoyPhotoClub/