I really want to get back to sharing more photo tips, so this post is about how to color pop images. I shared this post several years ago when I was a contributor at The Idea Room, but I’m changing it up some to share here. I use photoshop SOLELY to edit my images. I know a lot of people love Lightroom or even PicMonkey, but I don’t know those programs.
For those of you familiar with my blog, you know I wrote a little beginner photography book called Say NO to Auto. I strongly emphasize shooting in full manual settings to learn how to get the most beautiful images possible.
I strongly believe that you enhance beautifully taken images with photoshop, it wasn’t created to simply “fix” bad images. It can do that, but it will never be as beautiful as a well taken image–enhanced.
That’s what photoshop is to me with color–an enhancer. Did you know that when we all switched from Film to Digital–away went the saturation glow that came from film. Soooo, we get to bring it back with editing.
Photoshop lingo is a foreign language. A few years ago, I’d ask how to do something, and I’d hear “blah blah blah blah blah blah blah” as the response and I sat there with my jaw dropped staring at the person who just spoke to me. Ok, maybe I was staring at my computer screen as I read the words, but same thing, right? This, like switching to manual settings can be a frustrating process that will not come overnight. I’ve never liked when my husband says to me, “Don’t try to do it all at once.” And my reply would be…”but I want to, and I don’t know which to choose first!” This is true about the photography process, you really have to try to work on one thing at a time…but do what you will:)
I pop my color with a soft light layer.
Here is MY workflow—or steps I take to get my images to my own personal perfected state.
Let me just say that I shoot in RAW. I won’t go into detail, but shooting in RAW allows you to do minor tweaks to exposure and saturation on a file before converting it to JPG. Shooting in RAW just makes processing 300 images per session MUCH faster. I love it.
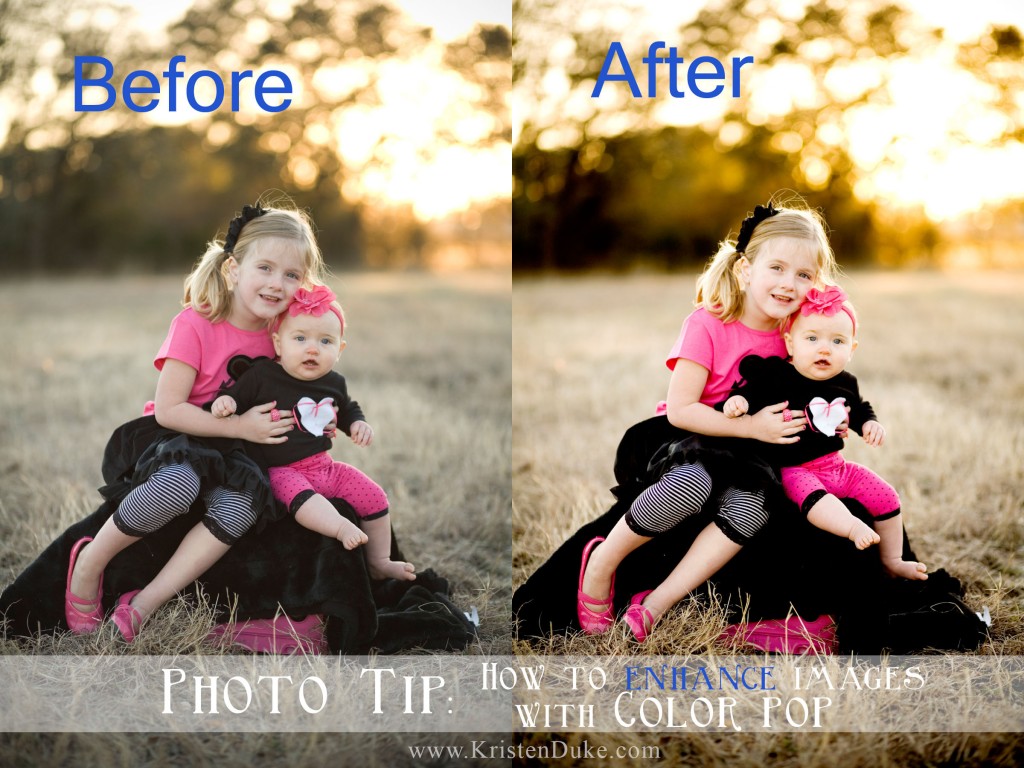
When you look at this image below, it isn’t all that bad. A little dark, but decent, right? It isn’t until you see it as it could be that you realize it could be much better.

Let’s do that.
I open up my JPG file and see what needs to be done.
Is it too dark? To lighten, I open up levels—control “L” There is a slider (3 arrows under the histogram/mountain) and I can move the middle arrow right or left to lighten or darken. Play with the 3 arrows as you look at your image to determine a stopping point. Lightening a slightly dark image is easier than darkening a slightly light image. Blown images (too much light) are harder to save. After you like it, hit OK.

After I’ve played with levels, I go to the soft light layer. Not sure this is in all versions of photoshop, please let me know! I go to the top menu where is says: File- Edit- Image- Layer and click on LAYER. From the drop down choices, I select DUPLICATE LAYER and hit ok (see sample below).

Duplicating my layer allows me to have two layers of my image on top of each other. Keeping my original on the bottom, that layer stays the same.

Once my duplicate layer is highlighted in blue (it says background copy here) I can add the soft light layer.

Tweak the opacity to your liking. Opacity is how transparent a step in the process is, lightens or darkens.
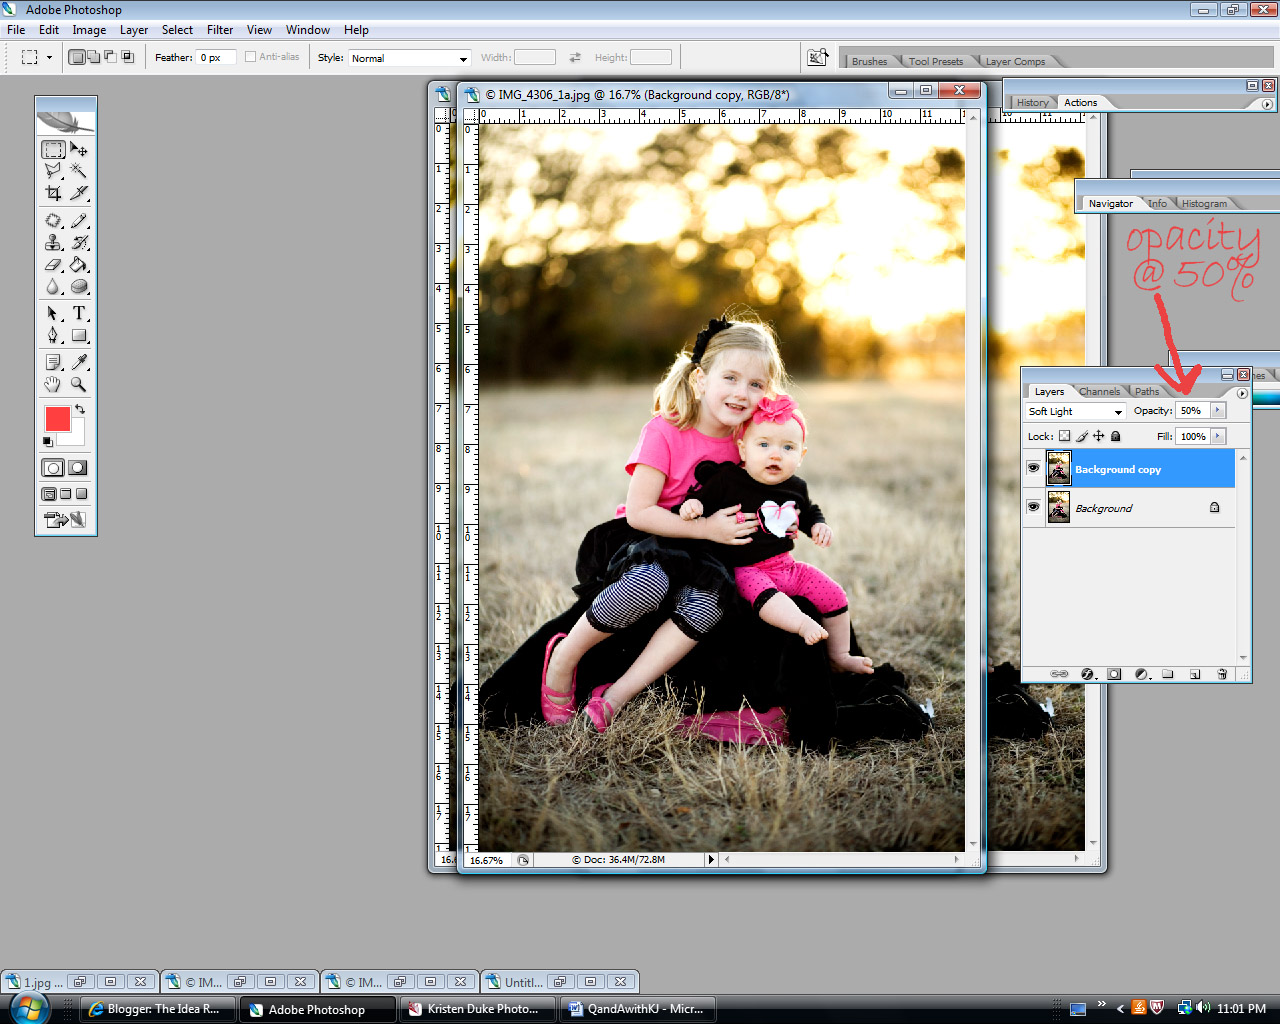 Depending on the image, I might want to keep the opacity at 100% or I might want to lower it to where I like the look.
I tweak the top layer to my liking and eventually merge the two layers (layer + flatten image) into one.


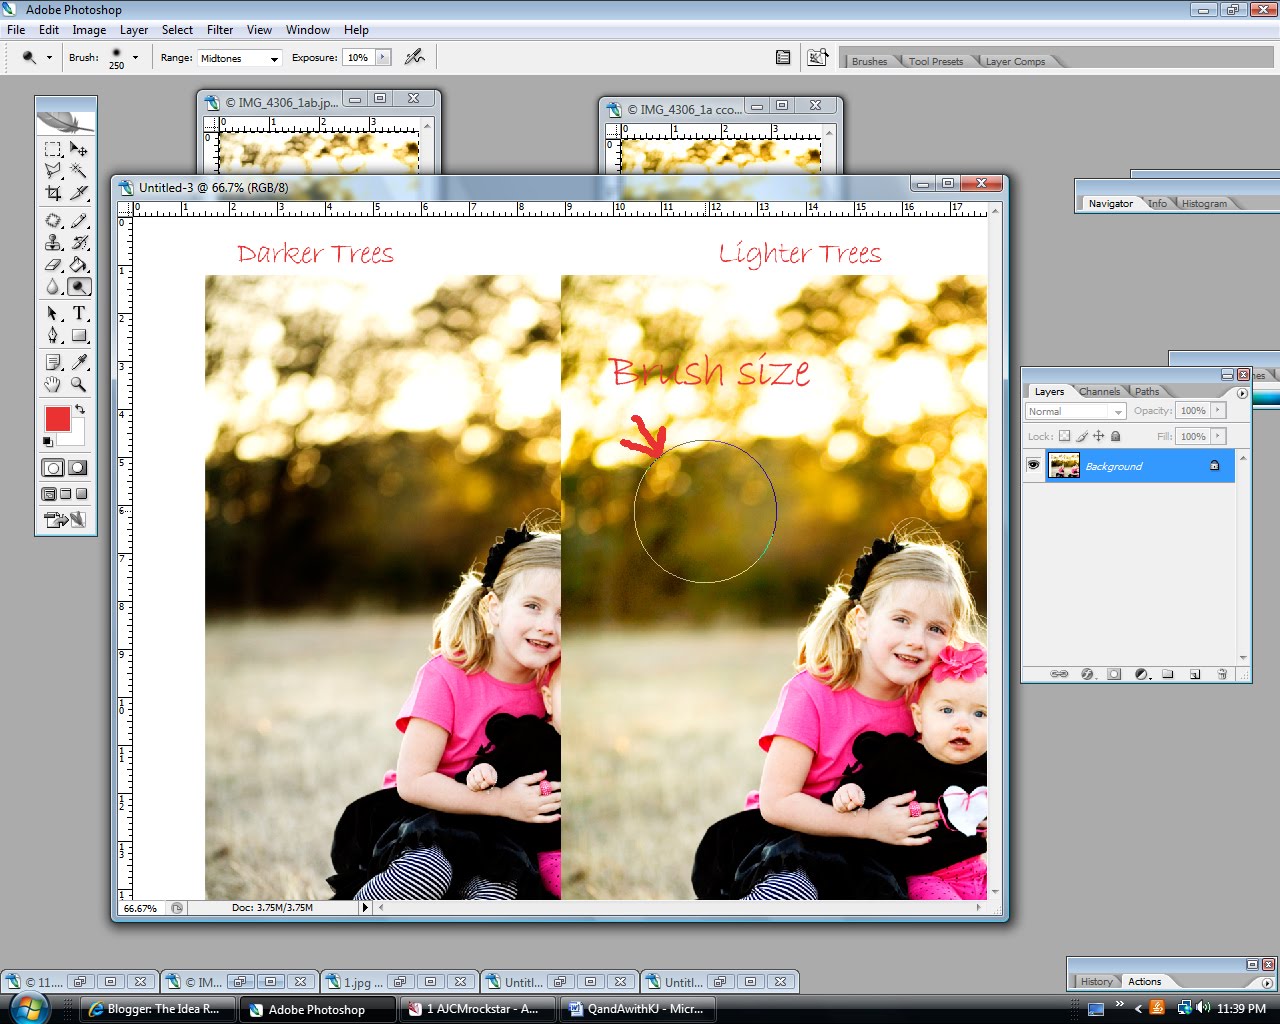


Just a little, not too much. But if you want more, up the opacity to a higher percentage.
At the end, I always save as a duplicate file (file, save as, img_123a) and keep my original as is (img_123).
If you have a fancy camera that you don’t know how to use, check out my books!

If you’d to join the Capturing Joy Photo Club on Facebook, where we have photo challenges, Q&A’s, and image sharing, request to join HERE: https://www.facebook.com/groups/CapturingJoyPhotoClub/