Hi everyone! I’m Autumn, from It’s Always Autumn, where I share sewing, crafting, and photography tutorials as well as recipes and printables. I’ve been following Kristen’s decorating with photos series for a couple of years now, so I was excited to be invited to join in this year!

I’m not much of a home decorator, to tell you the truth. I actually kind of like the look of bare walls, and I think I only own two knick knacks. That’s right, two. I do, however, love putting photos of my family all over my home. When my husband and I first starting having kids (back when we were poor students), my husband bought a bulletin board and filled it up with photos of our little family and gave it to me for mother’s day. I loved it! It was so much fun to sit and look through all the pictures, and I loved the collage feel. It inspired my current favorite photo display, a wall-sized photo bulletin board:
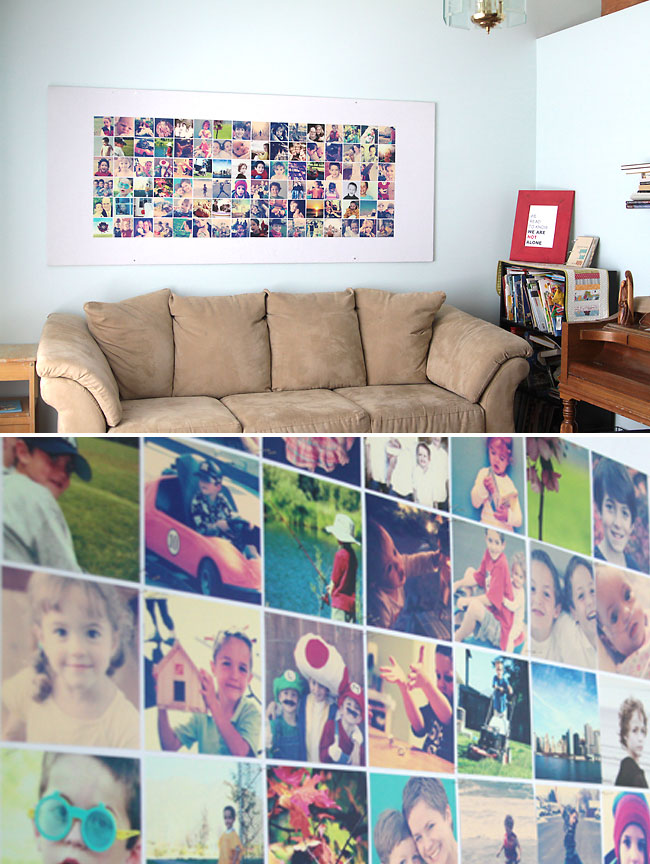
I love the impact of huge photo collages, but hanging tons of photos on a wall and getting them all lined up can be an enormous headache (I know, I’ve tried). Starting with a huge bulletin board where you can just pin on the photos makes a large collage much easier. This bulletin board is made from a common building supply that’s cheap (the entire thing costs under $20), lightweight (mine is 7 ft wide a 3 ft tall and I can lift it on my own easily), and perfect for using straight pins or pushpins (you won’t kill your fingers getting the pins in). Check out the full post for supplies and step-by-step assembly instructions.
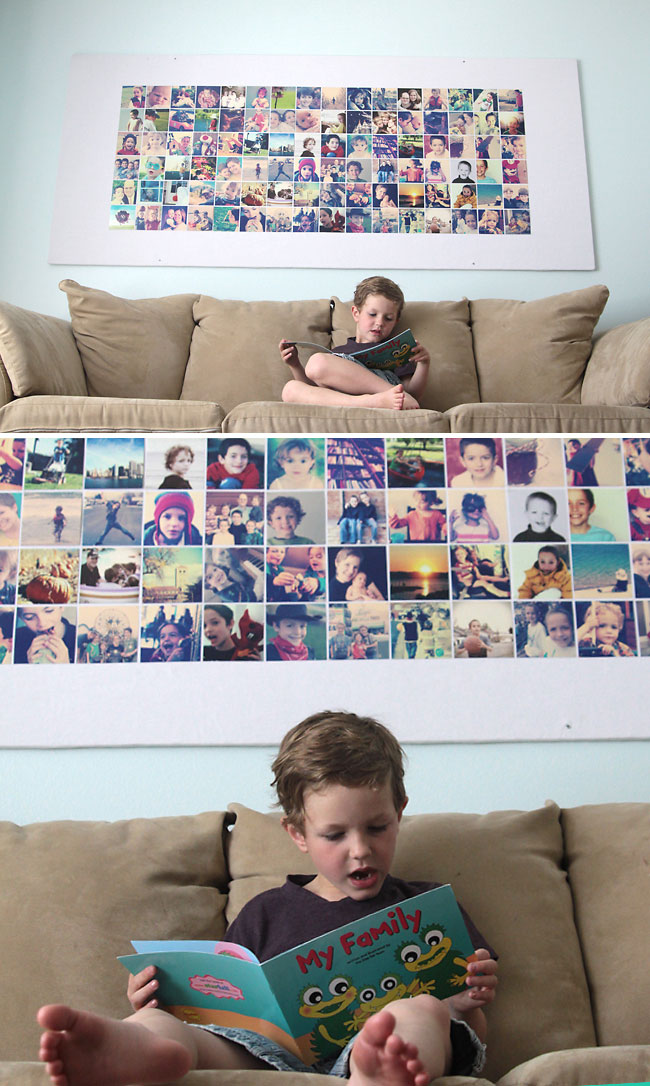
I used instragram style photos in my bulletin board collage because I liked the mix of pumped up colors – but at the time I made this I didn’t even have a smart phone! So I used Photoshop actions to get the instagram look on my photos.
My next photo project is also a wall/collage idea. For this display, I created a photo collage of each of my children using Photoshop Elements (here’s a screencast showing the easiest way to do that). Then I printed each collage out as a 16×20 photo, then adhered the photos to a cheap 16×20 canvas.
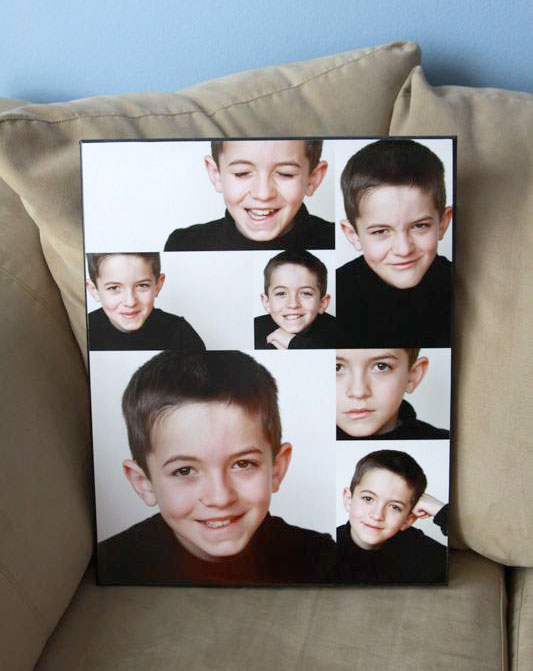
I wanted to duplicate the look of a gallery wall without spending the money for 5 large canvas prints – that would have been at least $300. By going DIY, I was able to get the same canvas gallery wall feel for about $50, or $10 per collage (and I was even able to change out the photos the next year). Here’s the full post for step-by-step instructions. (And see this post for tips on how I got these personality-filled photos of my kids.)

The last photo project I want to share with you guys is a really simple one – a photo frame made from a favorite book. I love books. I read at least one book a week (before I started blogging it was probably about 3 books a week), and we have tons of books in our house. Bookcases full and piles in the basement… So I turned a couple favorite hardcover books into photo frames.
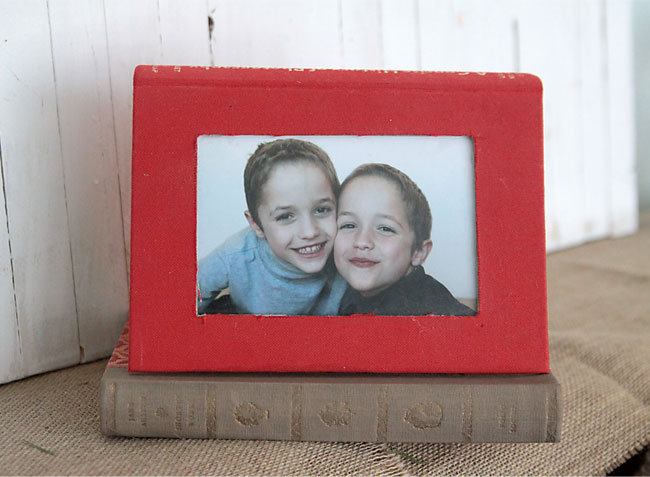
The process takes less than 15 minutes and doesn’t harm the book or the photo – the book is still completely readable and the photo can easily be swapped out. Like my other photo projects, this one is budget-friendly – in fact, probably free since I bet you already have all the supplies on hand. Click here for instructions.
I’m so glad to be involved with the series and I can’t wait to see what everyone else is sharing!
Find more from Autumn on her blog, on Facebook, or on Pinterest.
~~~~~~~~~~~~~~~~~~~~
Thank you, Autumn! I simply LOVE that giant collage, I need to make one!
If you’ve missed any of the posts from the Decorating with Pictures Series, check them out HERE or click on the image below. Every day in February is packed with 2 inspiring posts, each with a giveaway from a fabulous brand! (If you need help taking better pictures, I’m giving away my Say NO to Auto beginner camera Workshop on video AND my books as well!) Follow along in the series!
Today our giveaway is from The Chic Orchid. From their words, “Our logo is the rare ghost orchid. Capturing it’s uniqueness and rarity, we offer our customers “chic looks at amazing prices”! Our products are the same high-quality items you’d find in stylish boutiques across the country – without the high-end price tag. Our goal is to bring you the latest fashions at the lowest price!”
TWO winners will each receive $50 to spend at their shop!
a Rafflecopter giveaway
