Learn how to take Floating Pictures to create fun photos for Halloween this year. Frame them to create a Halloween decoration you can enjoy for years to come.

I’m all about creating memories with my kids, and I also ‘puffy heart’ love holidays. Why not combine my love of the holiday and photography? For Halloween I thought it would be fun to take some floating pictures of my daughter.
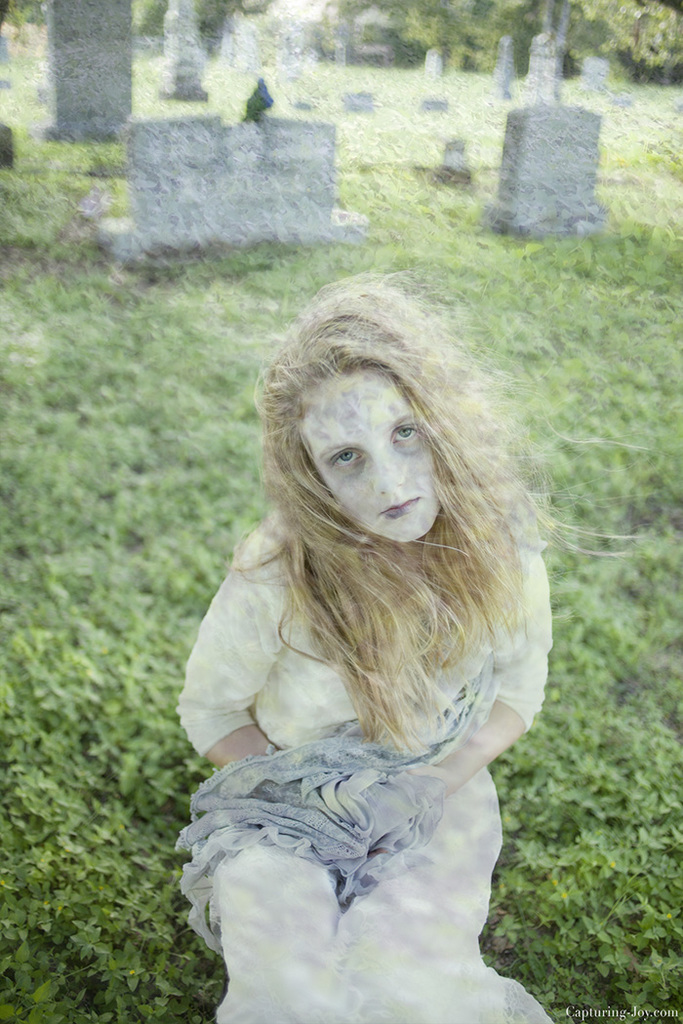
I’ll tell you this, my daughter had SO much fun with this little photo shoot. She played the part of the ghostly zombie quite well. At the end, she blurted, “This was so fun, let’s do it again!” And that’s what it’s all about…having fun with the kids, right? Sometimes those posey-posey shots just aren’t so fun for them, but getting into a theme like this can be.
Here is my 11 year old ghostly zombie girl playing her part…
We painted her face with some white, and dark circles. When her neck and arms showed too much color, I just desaturated the color in photoshop match. You could do zombie pictures just like this, but we played around a little, and I want to teach you some steps to make it look more ghostly in photoshop. That’s my editing platform of choice, but I know there are other ways to achieve this look.
Here we have some pictures of her floating….

And what about a more ghostly image (note the gravestone name through her leg)

Floating Image
- Decide on a background and set up a tripod to snap a shot without your subject
- Keeping the tripod in the same place, snap the shot of your subject on a stool (see below)
- Try a variety of positions, making sure to not move the tripod
- Using a remote will help, so as not to camera shake when pushing the button
- Shoot down low, so it will look as ghost-like as possible
- In photo shop, create two layers, with the non-subject picture on the bottom
- In your Photoshop bar on the top, go to: Layer—Layer Mask—Reveal All
- Then put your cursor on the pain brush tool, and turn the color palette to white, and you can erase the stool with the brush. If you mess up and accidentally erase too much, like the hand, switching to the black color can bring it back, It’s just like magic!
- To go a step further, after the bench is erased, go to the layers on the right, and lower the opacity of the top layer down 10-15% for the “see through” look like a ghost. If the tree’s moved slightly in the wind (as mine did) they will be a touch blurred out, but still the effect looks so fun!
- Flatten the layers into one, and save it as a .jpg. You’ll be sure to spook your friends!

Just for a visual, here is a shot of the background without my subject.

Here are a few more poses we played with

And one more, because I just love the dramatics of this girl.

Now go put on your Halloween costume and try taking floating pictures of your own.
The most popular Halloween idea on my site is my Halloween Lunch Box Jokes. These are fun to slip in kids (or husband’s) lunches the 2 weeks before Halloween! I’ve also got a second older set that will give you 4 weeks worth.
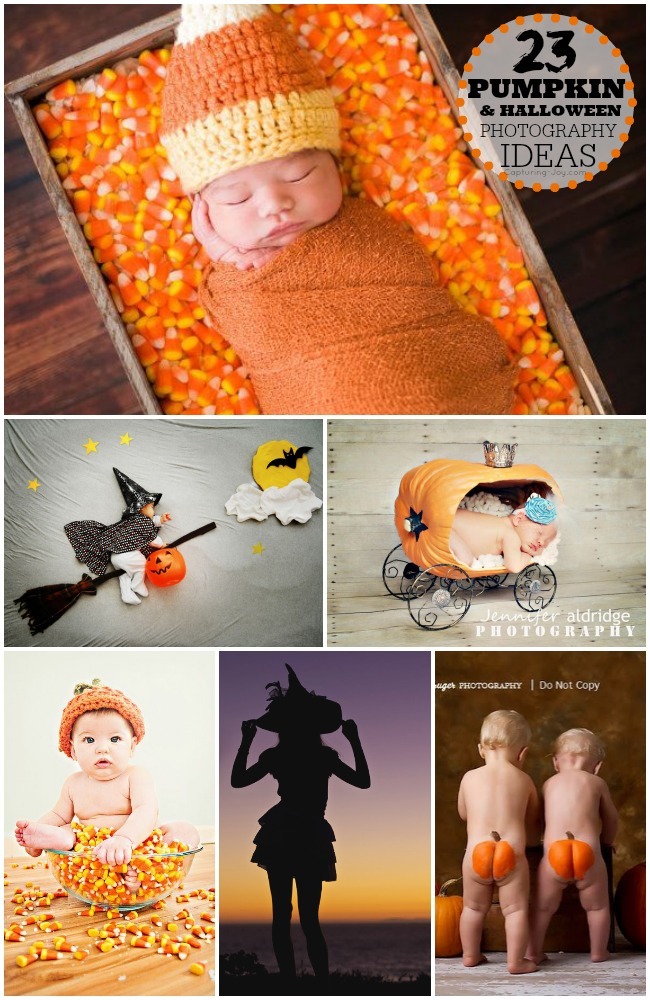
You may also love other Halloween photography ideas.