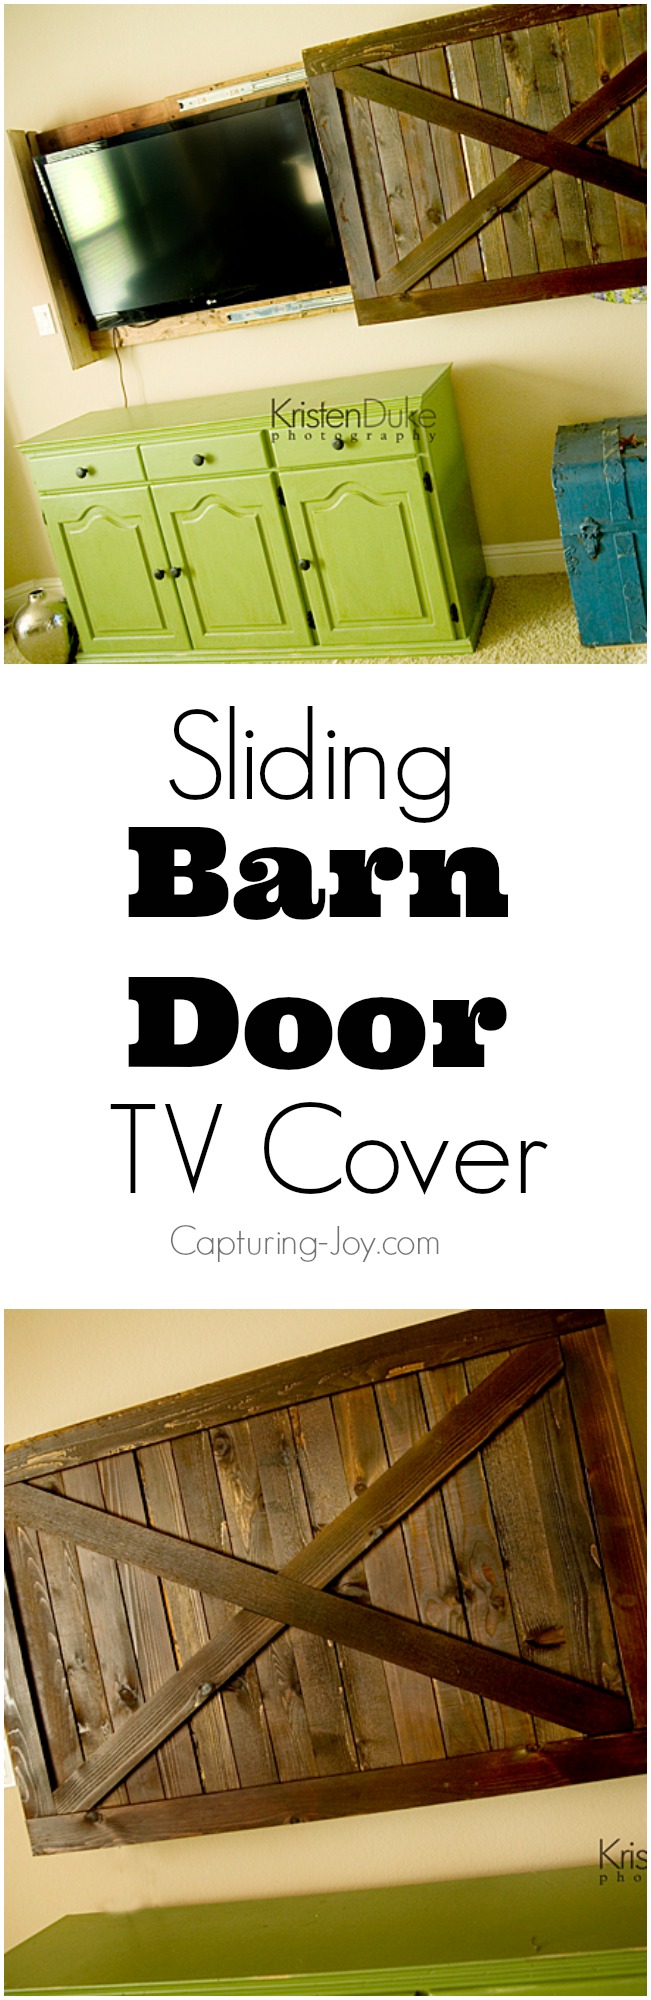
I’m so squealing excited to share one of my big surprises that I’ve been working on. This sliding barn door TV cover has been in the works since last October and it’s finally DONE!
Check it out:

Materials: $75
Time: 2-3 hours labor
I am seriously in love with this new piece of furniture/home decor…mostly because when our TV isn’t being watched, it is HIDDEN! And because my hubby and I worked together to make it come to life.

Do you wanna hear the story behind it all before the tutorial? Well, you’re going to.
It took a lot for me to say goodbye to my beloved green armoire. Fortunately, it didn’t go far (now in my office with his twin sisters) but I just loved it. Loved it’s height, it’s green-ness, that I could shut the tv away. We had an OLLLLD tv inside of it, and we were just fine with it. I figured I’d keep it forever. I didn’t need to upgrade to no stinkin’ flat screen and abandon my dear 27 inch television. I wouldn’t do that. My hubby seemed quite content to do that as well. But, we figured we wouldn’t be gettin’ any teenagers over here for movie parties, so we had to step up our game. (Though my son is only 11, we are planning ahead). It took months for me to warm to the idea, and I told my hubby the only way I would do it is if we could figure out a way to cover it.
We started talking about wooden sliding contraptions, and the idea of the barn door was formed. Lucky for me, my hubby is quite skilled in wood working as well as design. I was very adament about a few things and one was that I didn’t want to see any hardware. I didn’t want to see metal when the door was closed. He came up with a drawing that delighted me, and we set forth to find a TV. We got that in October, but I said we couldn’t actually build the barn door until I found the perfect buffet type situation to anchor it down underneath. So, the barn door building was at a hault until I found that perfect piece.

I originally found a hutch for $600 unfinished, but I wanted to find something for $100. The week after we got the tv, I ran all over town to good wills, furniture stores, looked online, you name it. I knew I wanted it a certain height and width and everything else didn’t really matter. I also knew I was going to paint it, so finish also didn’t matter.
I had seen a few on Craigs List, but I wasn’t fast enough to act on them. I was trying to be methodical and think it through, but I realized I kinda had to be impulsive. I found an intermediate piece at Salvation Army that was sortof what I wanted…but not really. When I bought it, I figured I could turn around and sell it for the same price…once I got my desired piece.

{black temporary stand}
It was almost Thanksgiving and my hubby started to get cranky that I hadn’t found something yet, because he was anxious to get building. I looked again at the $600 piece, because I decided it was exactly what I wanted: a few drawers, a few cabinets, perfect height and width.
I checked Craigs List for one last ditch effort and there it was! I believe it was the morning of Black Friday. Everyone was out shopping, but this is the only shopping I did. I emailed and called the listing, and they were anxious to have me come quickly…so I did. I can’t remember the price, but right around $100. I was happy!
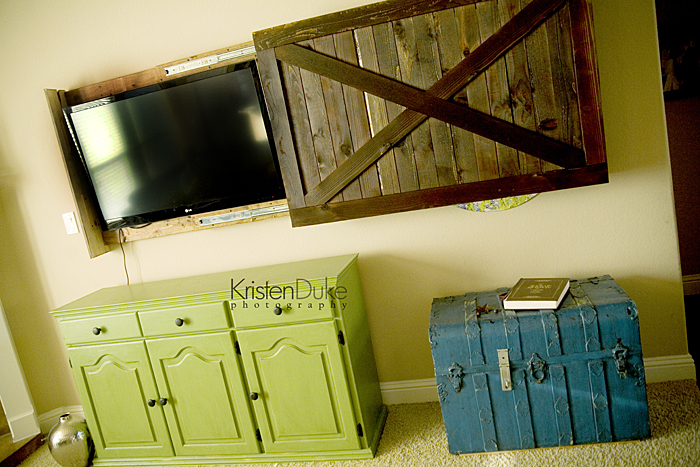
Now we could get started on the barn door! Hubby got a bunch of fence pieces at the store, and started piecing them together. It cost around $15 dollars to make the actual barn door with fence slats and 2×4’s


{I couldn’t decide if I wanted an “x” or “v” so here hubby sits and waits as I stare at it and try to figure it out}
He had planned all along to use drawer sliders, but upon realizing the longest they had locally (and inexpensive) wouldn’t go as far as we planned, we felt stuck. My hubby called a bunch of local stores and looked all over online. What we wanted would be about $400+ for the 48 inches he needed because it was a specialty order…and for those, they would extend on the wall beyond our barn door, and I wanted it all to be concealed underneath.
SO, he decided to get 2-24 inch draw sliders ($18 each) and build them in a series with each other to form the 48 inches he needed. Those mounted on 2×4’s on the back of the door and under the TV.


Once that got into place, he had to line up the hardware on the door with the hardware on the wall, and that was a lot of measuring tedious-ness! And I was only watching! Lets say we slid the door off and on approximately 1000 times (this in not included in the 2-3 hour approximation). Maybe a few less. It was sticking and not closing all the way at times, other times, the measurement was ever so slightly off. There might have been some exasperated sighs by one or both of us at times.
Our friend taught my hubby how to do some electrical re-wiring so the cord would go through the wall to the green buffet where our DVD player will be stored.


Then I stained it a nice brown stain (2 coats) with a little polyurathane on top. Hooray! I’m so excited to have it finally done!!!
Here are a few more pics from varying angles around the room:


{I thought I’d try out the wreath look as an option…}

Oh yeah, and we got new couches…she’s trying to “hide” from the picture, but I kinda liked her there…;)

We are all pretty happy and excited about the room transformation!
We’ve since updated the room, come see our Family Room Makeover!
