One might think that photographing an in-animate object such as food would be pretty easy. I mean, it sits still, unlike toddlers, right? I’ve spent years taking pictures of families, and when I dipped into photographing food, I realized it was MUCH MUCH harder! I’ve got a few tips for photographing food.
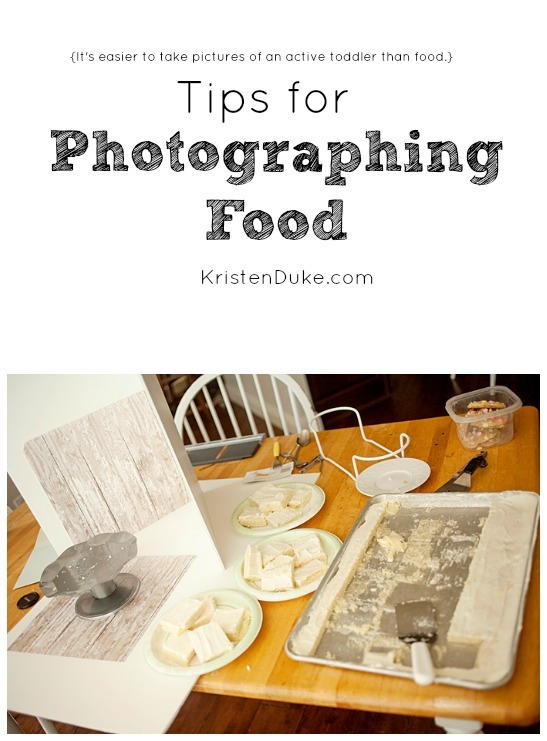
Photographing food isn’t as easy as it sounds. I’ve photographed people for over 10 years, and I think food is much more difficult to capture. Some may laugh at that because, well, food doesn’t move around as much as people do, but you have to set up the food scene to make it look appetizing. I’ve been photographing food more seriously on my blog the past year, and I’ve researched and picked up some tips that will hopefully help others out in their food photography journey. I’ve started a collection of plates, utensils, papers, fabrics, and other odds & ends to help me set up the scene for pictures. I feel like I have a LOT of practice still in the new-to-me area of photography, but it’s a fun learning process.
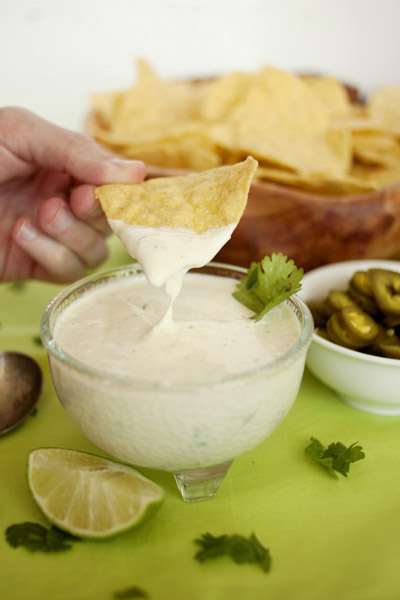
1. Props
In studying the images of some of my favorite food bloggers, I started noticing the props they used. From different colors, shapes, and textures of plates to Utensils like spoons and measuring cups. Not only were standard eating pieces used, but colorful cloth or paper napkins, scrapbook paper, cookie sheets, and even cupcake liners as props. It’s always fun to bring in different ideas into the mix, and sometimes they aren’t even seen, but help lift the plate or set up the scene better. One of my very favorite versatile props is s standard brown wood cutting board. I have a hard time bringing in too much color into my food pictures because I don’t want a certain recipe to seem TOO seasonal if I think it can be eaten all year long. Color affects the mood of an image so much, I often like to keep it simple with the background and focus on the color of the food. To each his own though…some people WANT their images to be seasonal. I used 3 different bowls, an ingredient, a cloth, and a hand as my prop in this Creamy Jalapeño Ranch Dip Recipe.
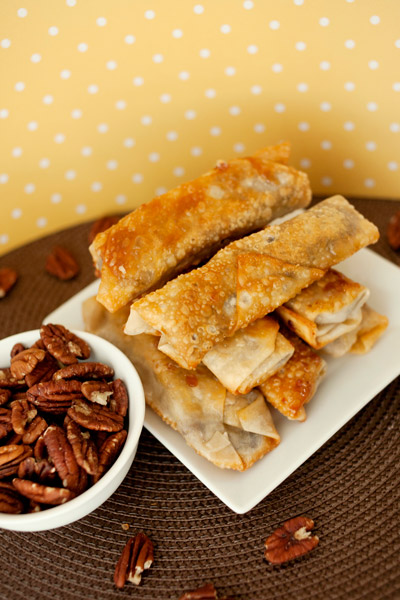
 2. Reserve ingredients
If I’m making a recipe such as my Pecan Pie Egg Rolls, I like to reserve some of the pecans from the cooking process and use them in my pictures in the background. I’ll either sprinkle them around the plate, or put a small jar next to the plate and fill it up. It just adds a little visual interest to the picture.
 3. Wide aperture
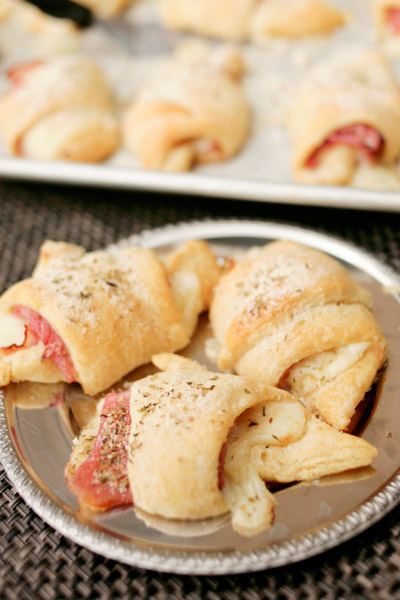
A wide aperture means that your f stop is a low number, such as 1.8. This allows the lens to focus on a small part of the recipe, while throwing the rest out of focus. If you look at this image from my Parmesan Ham & Swiss Crescent Rolls, you’ll see the front part of the image in focus, while the background pan of rolls is out of focus. This adds visual interest, with the emphasis being on the front rolls, but showing the entire pan in the background blurs says that this recipe makes a lot!
 4. Varying angles
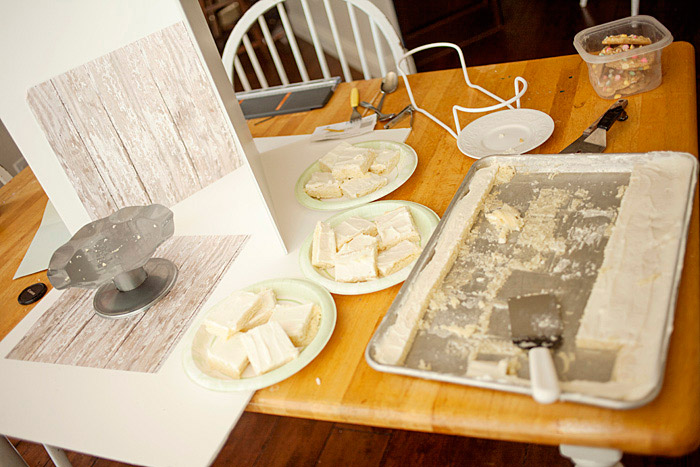
I’m a big fan of showing a variety of images when sharing about food. Up close, far away, shooting up high, and down low. People don’t get tired of too many pictures of food, so experiment! You’ll find you prefer some angles more than others, and that’s ok to keep up a style of sorts–others will start to recognize your photography! It’s even fun to share your photo set up as an angle when photographing like I did with these Fudgy Vanilla Brownies.
 5. Step by Step process
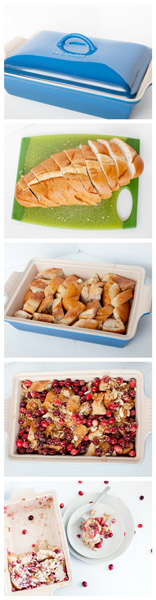
I love to share a step by step collage. It’s a quick glance for readers to see that the recipe isn’t so tricky after all–they can see the steps all at once! An example of this is from my Cranberry Almond French Toast Casserole. I showed how I cut the bread, arranged it in a pan, with berries on top, then served.
 Using some of these tips will definitely help spruce up your food pictures. It isn’t as easy as it seems, you gotta put a little thought into it!
To see more photo tips on my site, CLICK HERE.
If you’d to join the Capturing Joy Photo Club on Facebook, where we have photo challenges, Q&A’s, and image sharing, request to join HERE: https://www.facebook.com/groups/CapturingJoyPhotoClub/