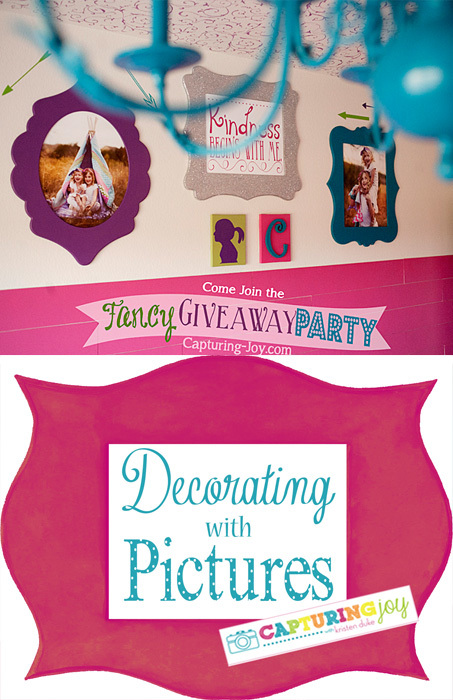
Sharing the gallery wall in my girls fancy room. I’ve got a doozy of a post for you!
I’ve been planning this in my head for months, and it is quite different from what I started with, but I LOVE the final results! I used Cut it Out unfinished wood frames, which gave me the liberty to paint them however I wanted, which was important because I had very specific colors for this room. I’ll share the entire room reveal next week, but today, we talk about the gallery wall. {Some cell phone pics mixed in–don’t just this photographer}
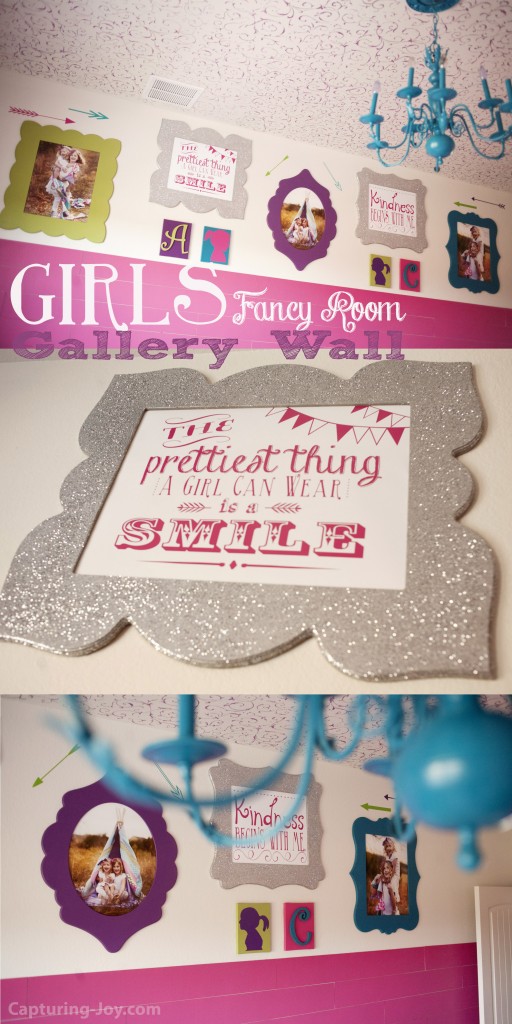
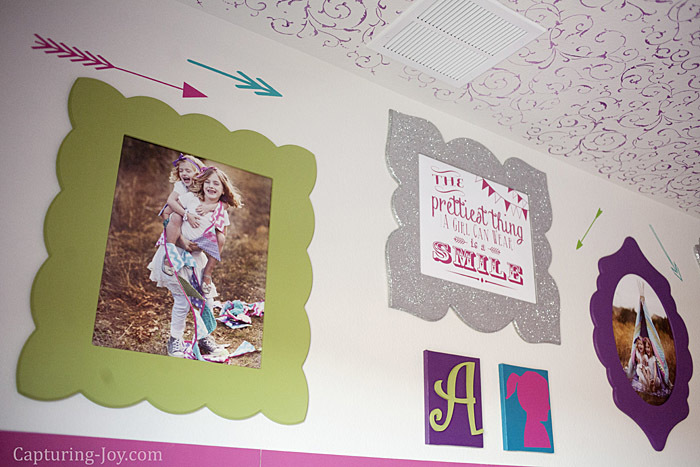
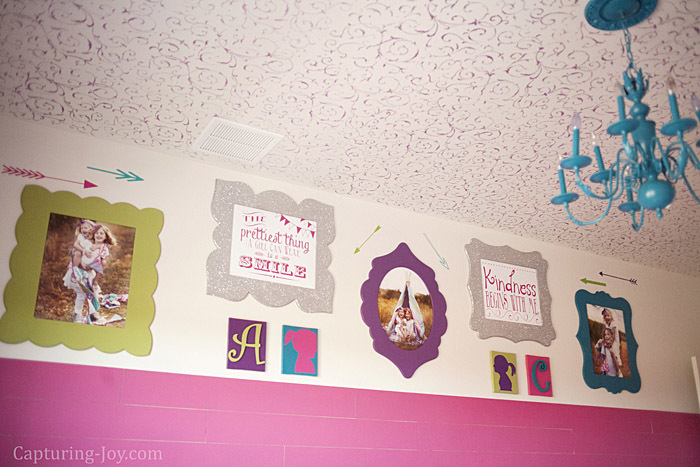
For a long time I’ve been passionate about decorating with pictures, and as a portrait photographer, I’m also a huge fan of BIG prints up on the walls. When I sell prints to clients, 8×10’s and 5×7’s are categorized as “desk prints.” In other words–too small to go on the wall! Sometimes smaller prints clustered together are ok, but really, I don’t put anything smaller than a 16×20 on my wall. So when I dreamed up this wall, I thought about 5 giant 16×20 frames–and these frames are fabulously built! When my shipment arrived, there was a lot of excitement!
I had a 4 paint color scheme in my head, but I wasn’t quite sure how that would translate into 5 frames.
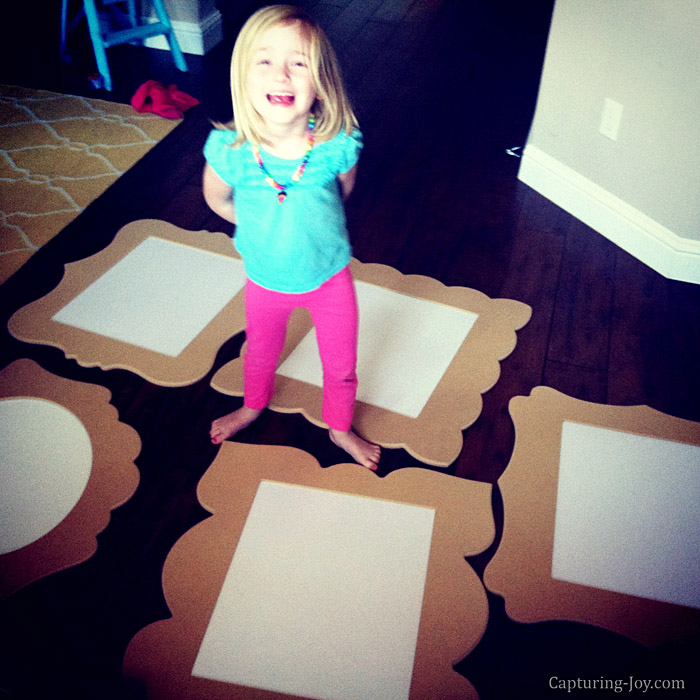
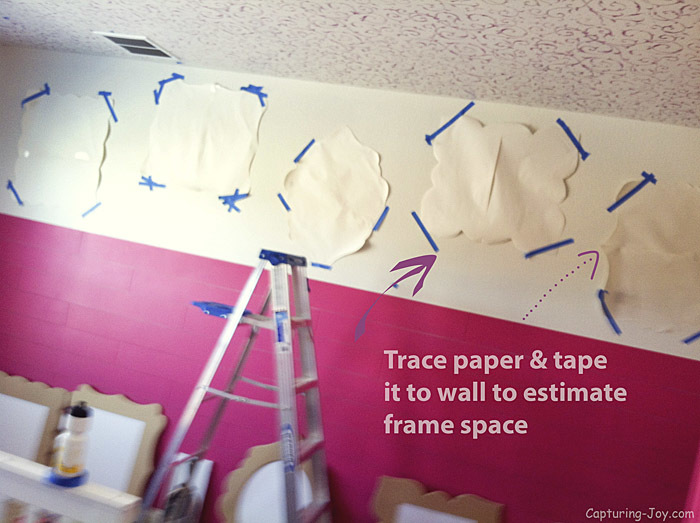
Some things I don’t think through clearly and just go with it…and figure it out later. I decided I need to just hang the unfinished frames and look at them in the room to decide. I got a roll of art paper and traced the frames, cut ’em out, and hung ’em up to get them positioned…just so. {I was annoyingly surprised that just one strip of tape didn’t hold them still.} This extra step was important and really helped me visualize, and know exactly where to hang the frames.
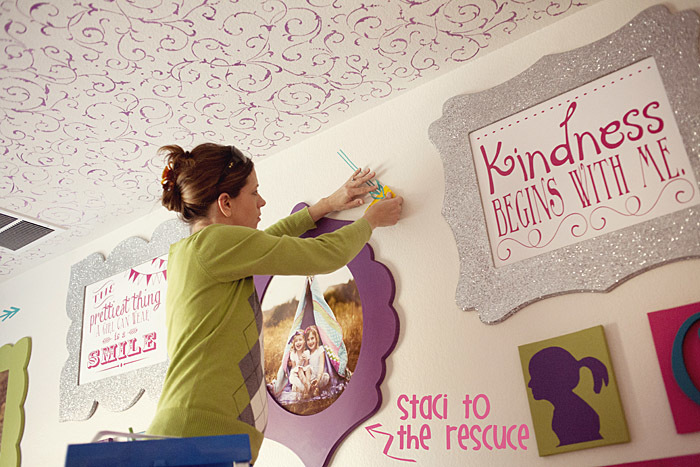
My hubby is pretty awesome, but he isn’t always a fan of all of my crazy projects if it involves him. Some tasks I think only he can do well because he is more of a perfectionist than I am, so I pull him into my schemes. I told him all I wanted for Valentine’s Day was for him to hang these frames…this way, I knew he’d do it with more of a smile on his face;)
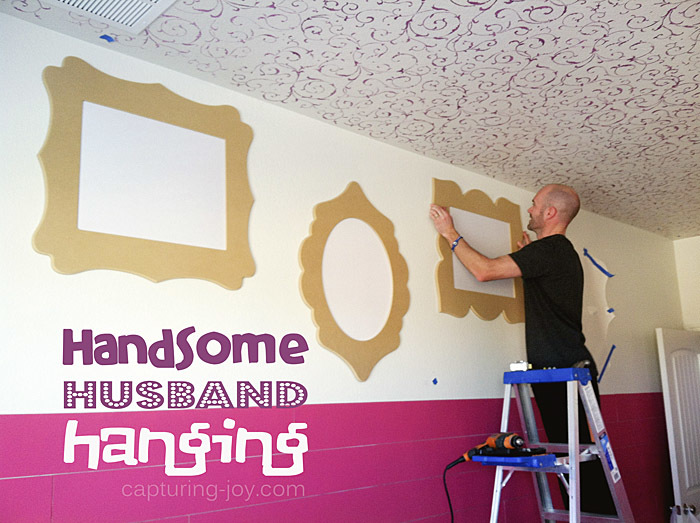
See that smile? Because the wall has lots of pink (more on that next week), I didn’t want to paint a frame pink, but started with the other 3 main colors, but wasn’t quite sure what I’d do with the center two frames. I texted about half a dozen creative friends the wall picture, and asked advice. I was going to do a polka dot and stripes in the middle, but after I got the frames up, I decided to stick with solids because of the stenciled ceiling, and other patterns in the room. I hemmed and hawed, and thought to do just silver, then decided on silver GLITTER! I painted the base a gray primer, then spread mod podge on the frame, and dumped a bunch of glitter on top. I was quite nervous about this step. I can’t paint over it as well if I didn’t like it, and glitter can get lumpy. I was careful, patient, and slow (not generally in my vocabulary) and I am SO overjoyed with how they turned out!
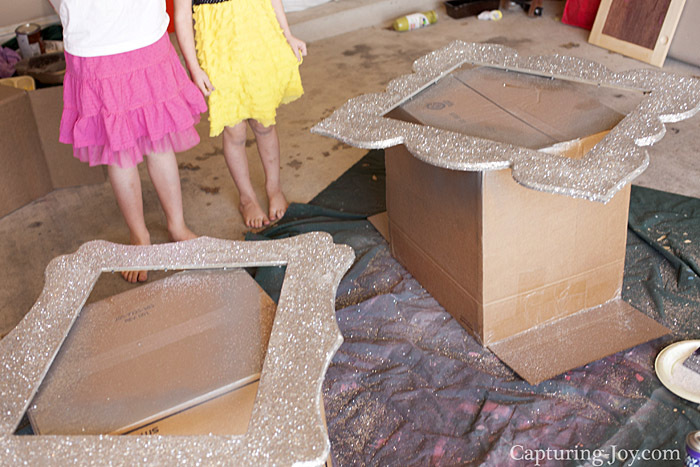
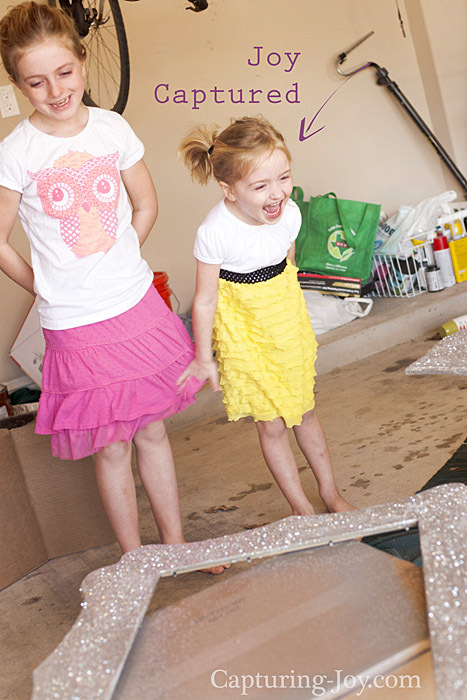
I also tried a glitter can of spray paint, but the texture was too dull for me…I wanted something vibrant! I brought the girls to the garage to see and I really did capture some joy.
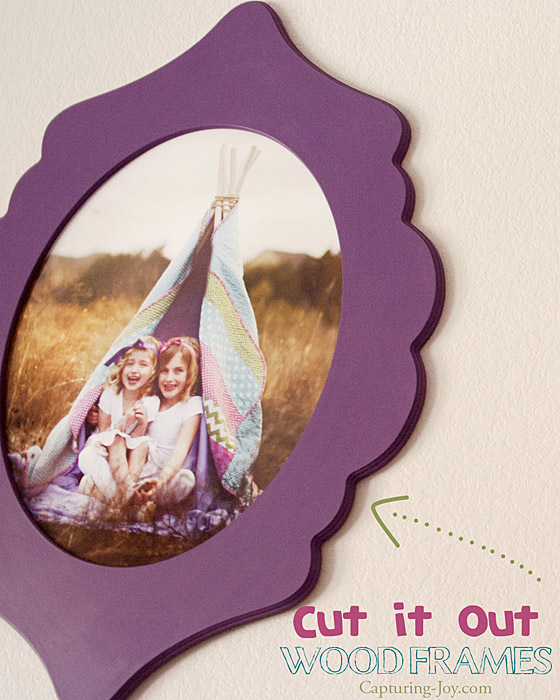
I recently took my girls to a nearby field to take some pictures to go in the frames. I worried it would be hard to narrow it down to 3, but I’m happy that the “3” seemed to jump out at me! In the picture shoot, we used the Riley Blake Designs Fabric Quilt my friend made, and my hubby constructed a tee pee with PVC pipe he has around the house.
![]()
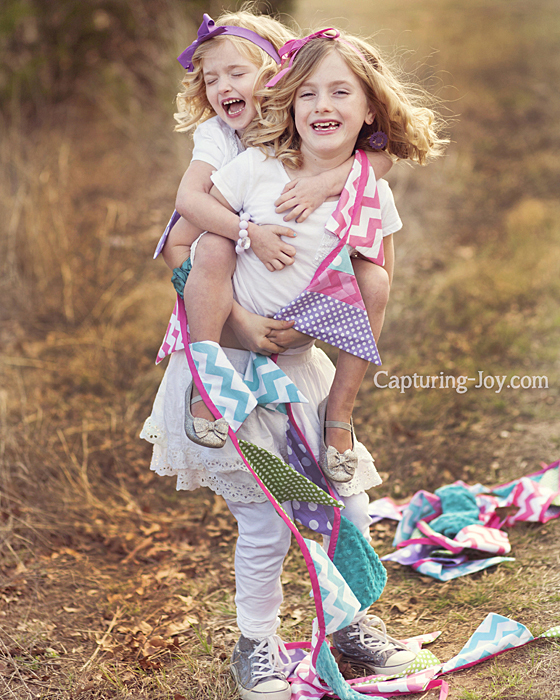

I just love these girls, and I love that they have so much fun together. The 4 year age gap that I originally saw as a negative, might just be a positive after all–at least for now.
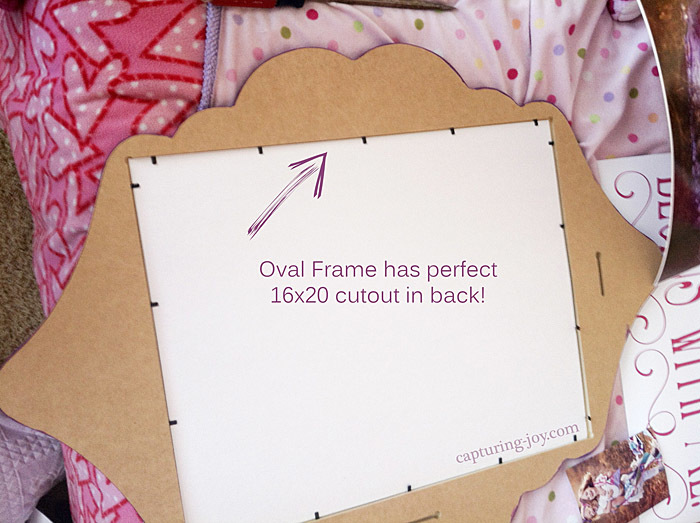
Back to the frames–I was very happy that I didn’t have to cut my print for the oval frame in the center. The back is just the same as the others, and my print fit in perfectly!
Once the frames were painted and up, I decided the space really needed a little something extra.
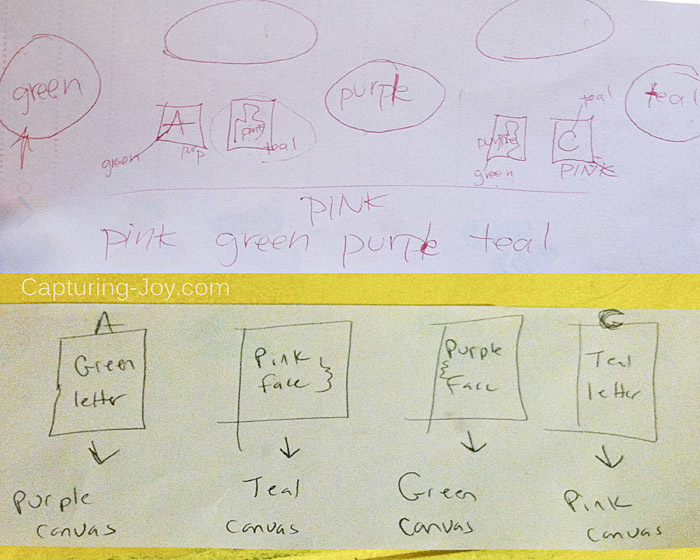
I had 4 8×10 canvas and 2 letter initials, with plans to make a silhouette head shot, but what colors to do everything? I was definitely over thinking it, and luckily my friend/neighbor Staci helped me think it through…we drew a few little maps for ourselves for colors. My messy handwriting in the above sketch.
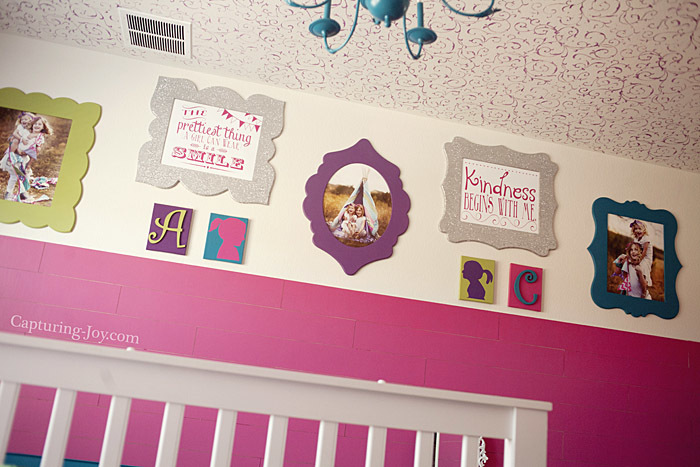
I made a Silhouette canvas with my Silhouette machine, click the link for a tutorial. Letters found at Hobby Lobby. The gallery wall was all up, and I thought I’d be done, but then I realized I wasn’t (this was just yesterday). Staci pulled in the clutch and had vinyl on hand in all 4 of my colors and we made some fun little arrows to fill in some dead white space. {I made the printables and will share those later.}
voila! I felt it was complete…though I am considering adding a few more arrows…
Here is an up close shot of Miss Purple.
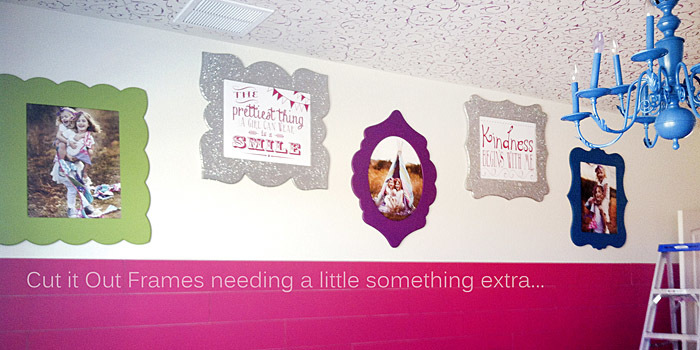
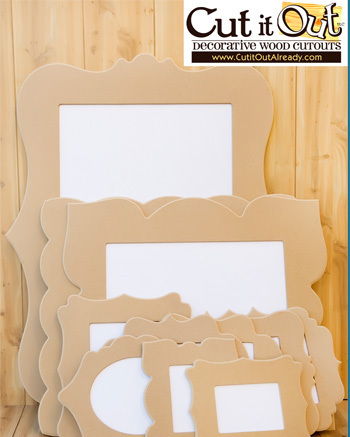
Are you with me that the 16×20 Cut it Out frame is pretty amazing??? At $25 per frame, it’s actually a pretty amazing deal if you ask me, but it’s still fun to win, right?!? Here are a few other shapes and sizes:
{Edited to add: The Girls Fancy Room Makeover Reveal is up, check it out!}
Now, I’ve got a fun link party so that everyone can link up how they decorate their homes with pictures. You’ve got til March 17th if you are working on a project that you want to share! The Link Party will run for two weeks, then I will pick a handful of my favorites to feature, so help me spread the word!
Share this image below via your favorite social media (Pinterest, Facebook, Instagram) to let others know about the link party, I would love a great collection and resource for all my readers with ideas!